In this tutorial we will wake you through on how to install LMS Moodle to XAMPP Apache local server
Requirements
- XAMPP set up and running on your device
- Access to internet
Please note, in this tutorial we won’t be explaining how to install XAMPP and set it up.
- Download Moodle LMS
- Extract Moodle LMS
- Move extracted Moodle LMS to the local server directory
- Start Installation process
- Create database
- Connect Database
- Fix common errors
- Finish setting up Moodle LMS
1.Download Moodle LMS
go to Latest release | Moodle downloads and click the version you want and download it as zip. for this tutorial we will use Moodle 4.3.2+

2.Extract Moodle LMS
after the download is complete go to the directory that holds the downloaded file and extract the files:

3.Move extracted Moodle LMS to the local server directory
Now after the extraction is complete head over to XAMPP, from XAMPP dashboard click over Explorer from the right buttons list.
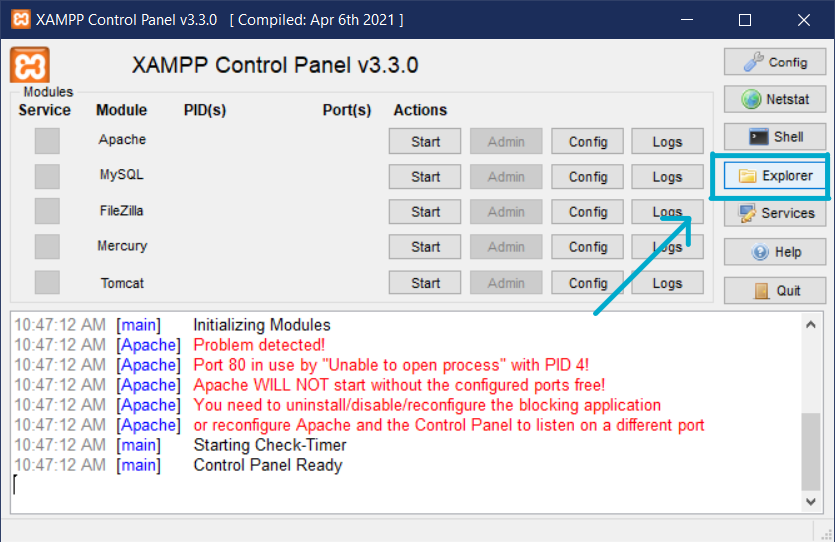
Open the explore look for htdocs and paste the extracted file inside htdocs folder.


Now you will need to go back to the XAMPP dashboard and start your Apache Server.


4.Start Installation process
Now go to your browser and Enter http://localhost:8080/moodle-latest-403/moodlethe number at the end might differ depending on the assigned port for that, you can check it from the XAMPP dashboard. the moodle-latest-403/moodle is the folder name that we copied to htdocs and isnide it there is a /moodle folder.
now if everything is good you should see the installation page for Moodle.

Choose the Language and Click on Next.

these are default settings I suggest keeping it as it is. Click next.
we will see the Moodle Database selection, choose MariaDb and click next.


5.Create database
now on a different browser tab, go to `http://localhost:8080/phpmyadmin` you will see this screen.
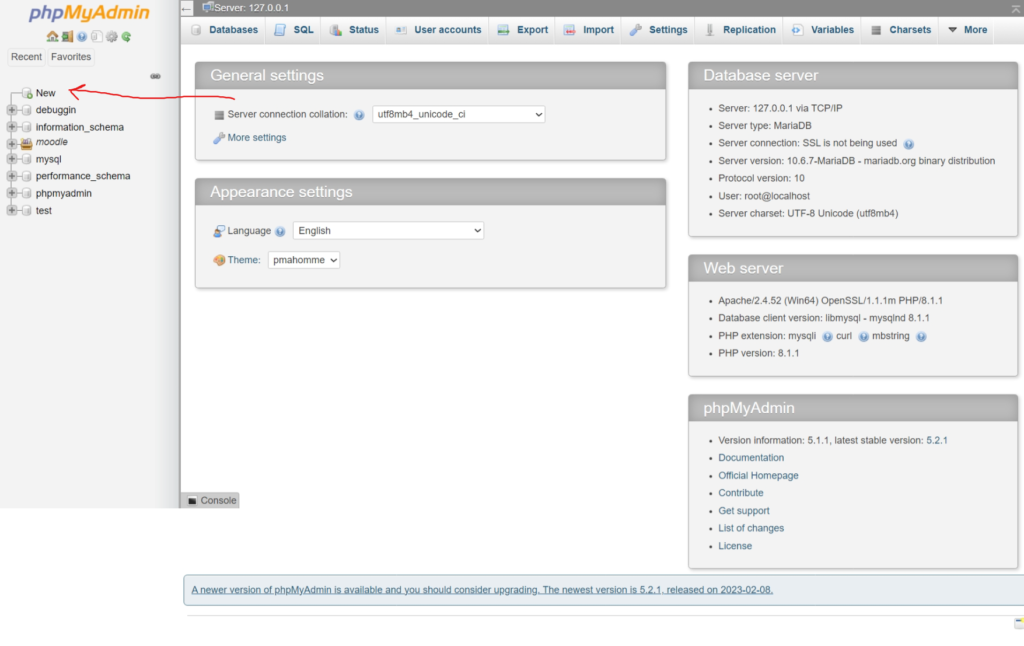
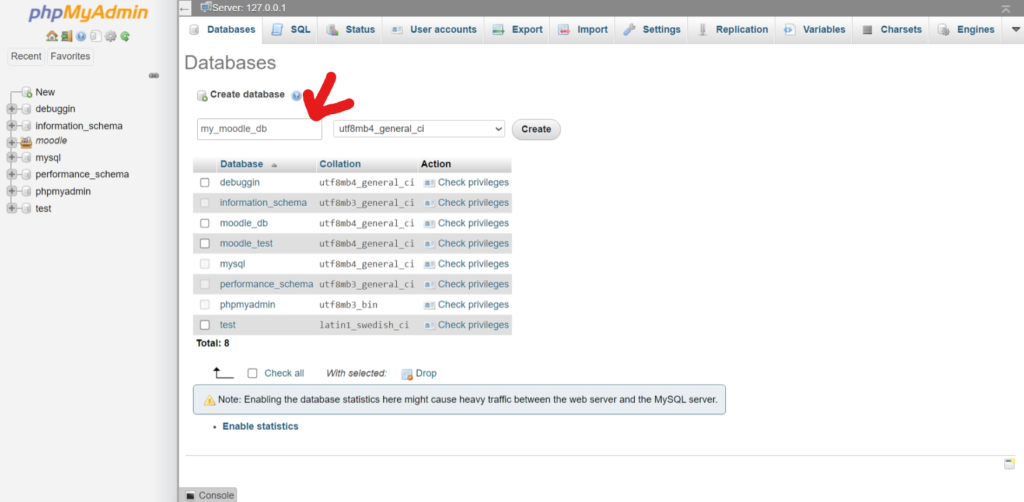
from left sidebar click on New and enter a name for your database and click on create. for example I entered ‘my_moodle_db’.
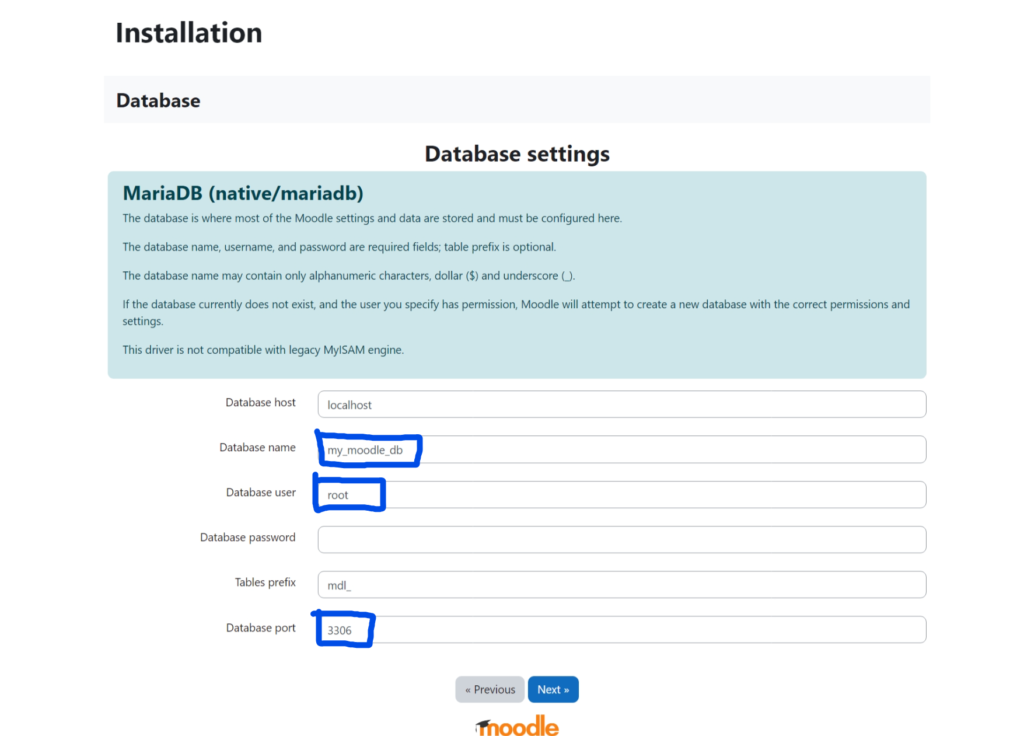
6.Connect Database
Now, back to the Moodle installation tab, set the following fields accordingly.
- Database name: name of your database in our case `my_moodle_db`.
- Database user: `root`
- Database port:
3306you can find this from the XAMMP dashboard next to the start button.
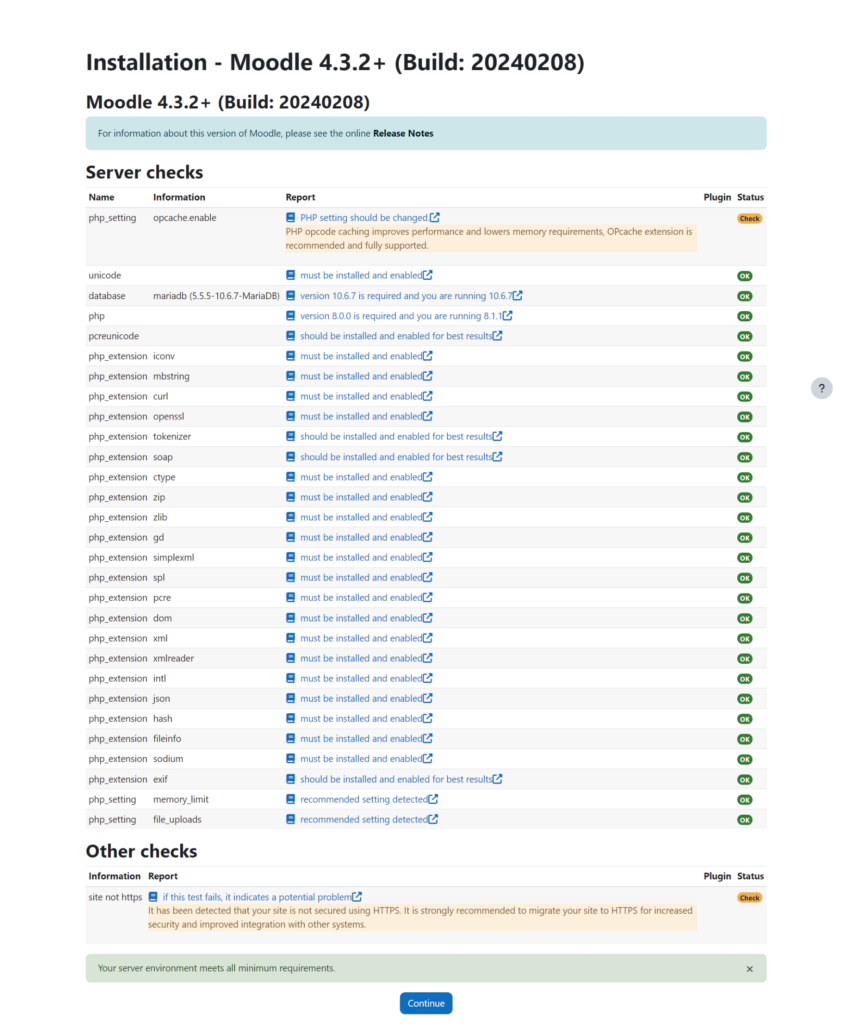
it will a min to load ….. click on Continue.

then you will have server checks (here if you have any issues you might need to resolve before you continue). In my case i don’t have any major ones so I can continue.
Don’t worry major issue will be marked with red color, and to solve these issues you can click on the link under the Report column.
After you click on Continue it will take some time to install Moodle be patient.
After it finish installation, you can click on Continue.
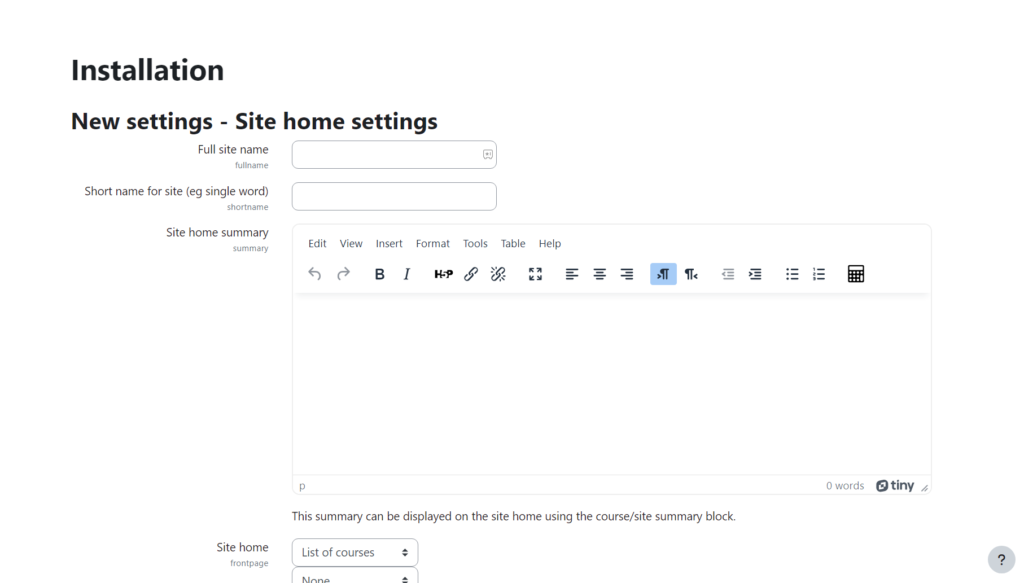
Now you can setup your Moodle general settings
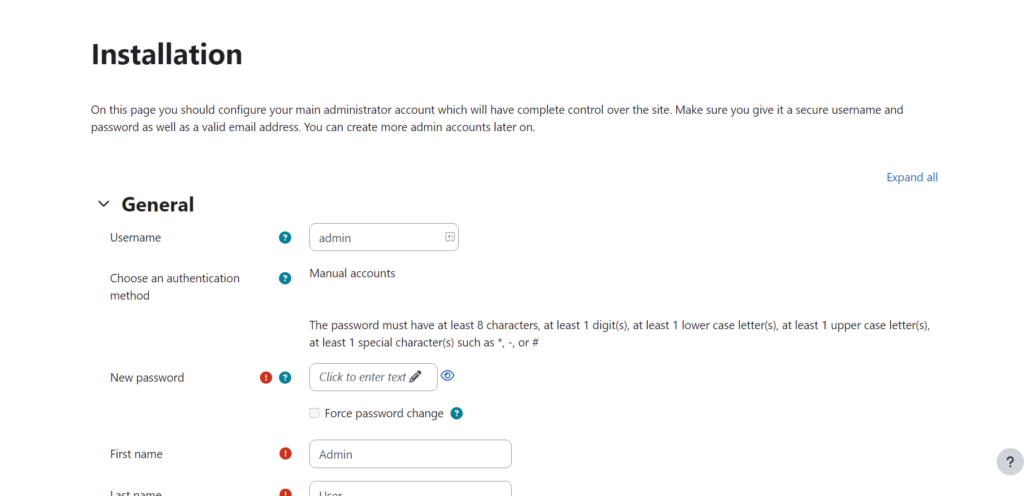
after you fill the required information click on Continue. We are not done yet.
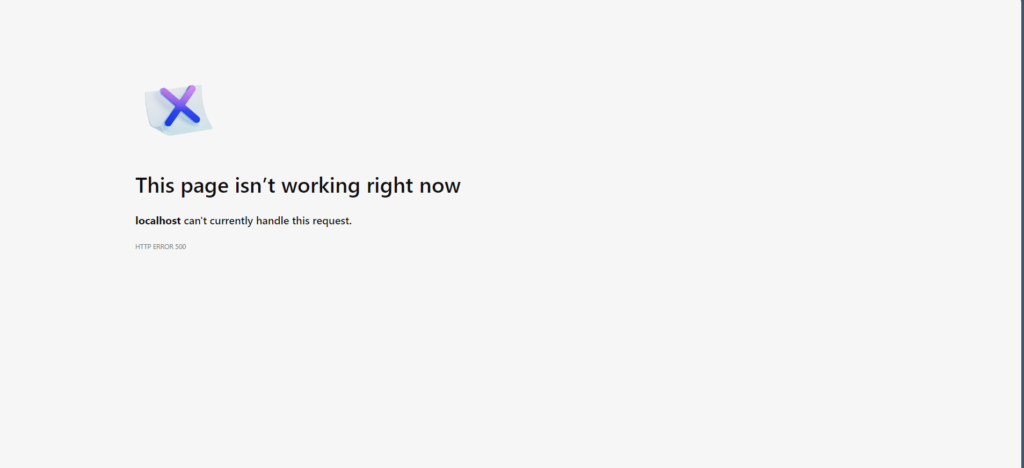
After the page loads for a while you might get this error, don’t worry I have a solution for you in the next step.
7.Fix common errors
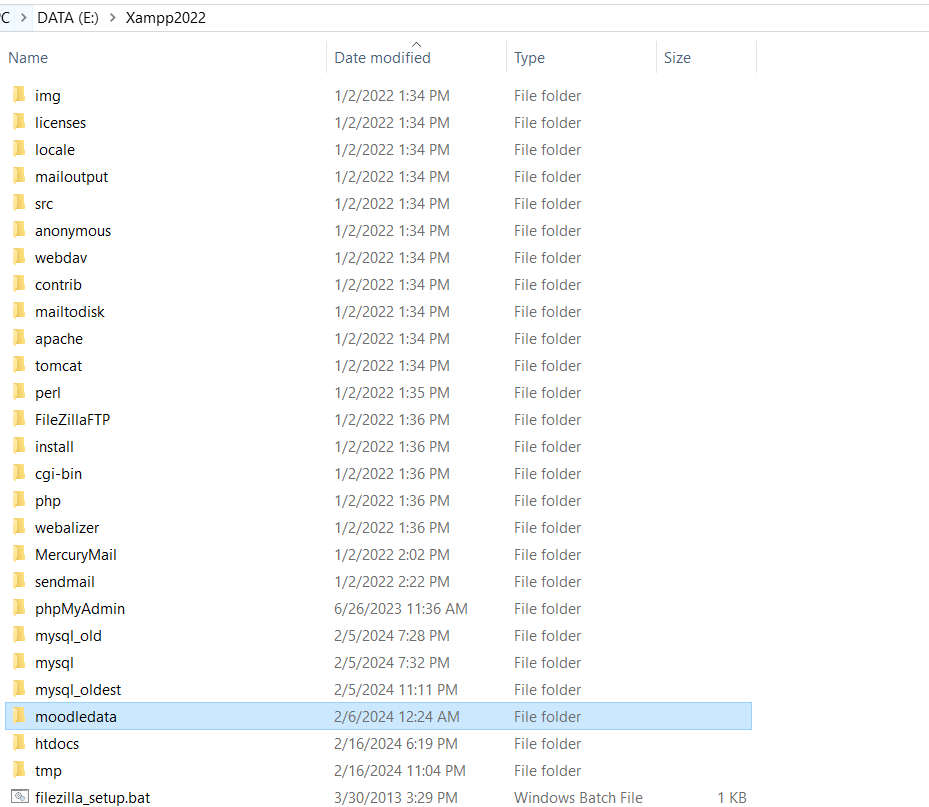
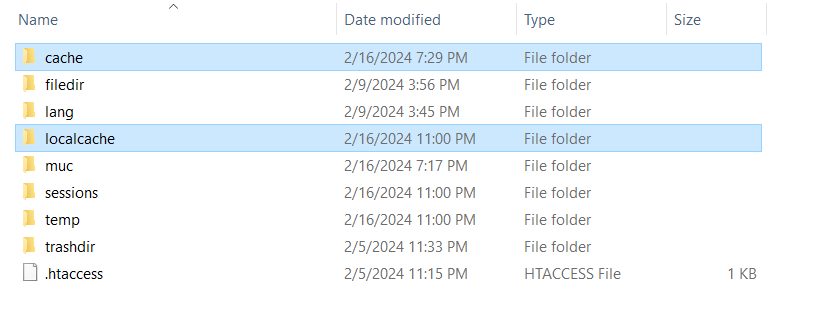
go back to the directory of your XAMPP app, step 3. open `moodledata` folder
select then delete `cache` and `localcache` folders.
Now go to the browser and enter `http://localhost:8080/moodle-latest-403/moodle/admin`.

You will be redirected to the login page of Moodle LMS. Congrats you created your own LMS
8.Finish setting up Moodle LMS
login using the coordinates you created on step 6 and start setting up yours LMS.